

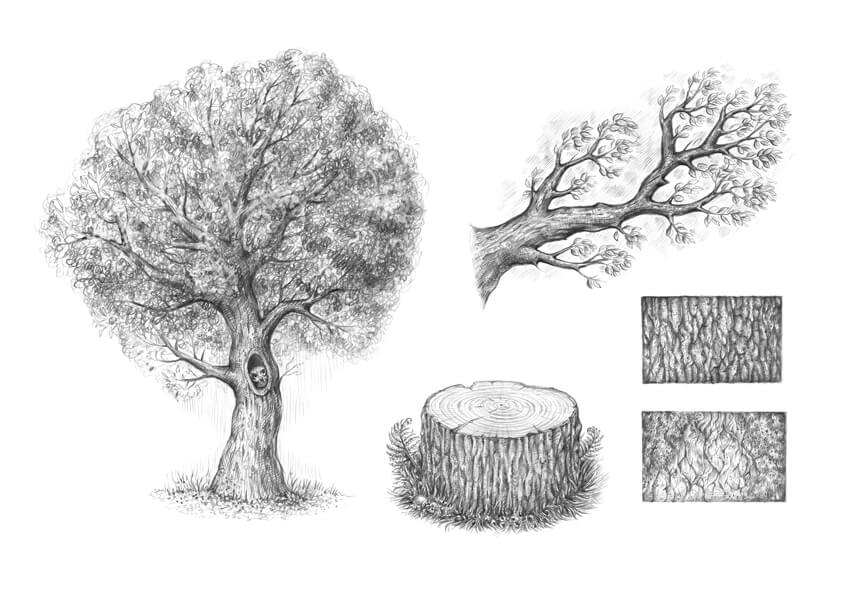
In this tutorial, I’ll show you how to draw a typical tree, using graphite pencils. But first, we need to observe some basic things, like constructing a branch with twigs, creating an illusion of foliage, and drawing the bark.
Let’s dive into the world of nature and have fun!
You may also be interested in these tutorials on drawing trees and leaves:


What You Will Need
You will need the following supplies to create this project:- an HB graphite pencil
- a 3B graphite pencil
- an eraser
- drawing paper

1. How to Draw Bark
Step 1
What is commonly called bark includes a number of different tissues that overlay the wood and serve as a protective barrier. For example, cork is an external tissue that is impermeable to water and gases.Why do we start with this part of the tree? Bark is a concluding element that covers the shape of the trunk and branches. Knowing how to draw bark will speed up our process later on, when we gain an understanding of designing a tree from scratch.
Let’s draw just a sample of the tree bark in close-up; we’ll focus on its pattern and details. With an HB pencil, I draw a small rectangle and fill it with lines that imitate the bark’s pattern.
Don’t overthink this pattern in the early stages; just draw something resembling irregular rhombs.

Step 2
I add more details to the drawing, using the HB pencil. The groups of parallel hatches help to create the illusion of a three-dimensional surface.
Step 3
With the 3B pencil, I darken the borders between the sections of bark. You can also use dots to make the texture more interesting.
Step 4
With the 3B pencil, I decrease the contrast, covering the sample with a layer of soft, smooth hatching. Then I accentuate the shadows once again. This sample is complete!
Step 5
Let’s create another sample of the bark texture; this time I draw larger shapes, using the HB pencil. I also add areas of moss and cover them with a layer of hatching.
Step 6
With the HB pencil, I add some shadows to the moss and the bark.
Step 7
With the 3B pencil, I increase the contrast in the drawing, accentuating the borders between the sections and under the moss.
Step 8
I add more details with dots and short hatches, using the 3B pencil. I also darken the perimeter of the sample to create an illusion of depth.
2. How to Draw a Branch
Step 1
A branch is a woody element that is connected to the central trunk of a tree. Large branches are known as boughs, and small branches are known as twigs or sprigs.Branches and twigs may be found in many different shapes and sizes; while branches can be nearly horizontal, vertical, or diagonal, the majority of trees have upwardly diagonal branches.
Let’s draw a standard branch; I mark its core line with the HB pencil. It’s also useful to mark the place where the branch connects to the trunk.

Step 2
I draw the form of the branch. Remember that it is a three-dimensional shape with a round foundation.
Step 3
I erase the subsidiary lines and refine the contour of the branch.
Step 4
I add the smaller branches. Feel free to add as many of them as you wish, and make them diverse.
Step 5
I add tiny twigs.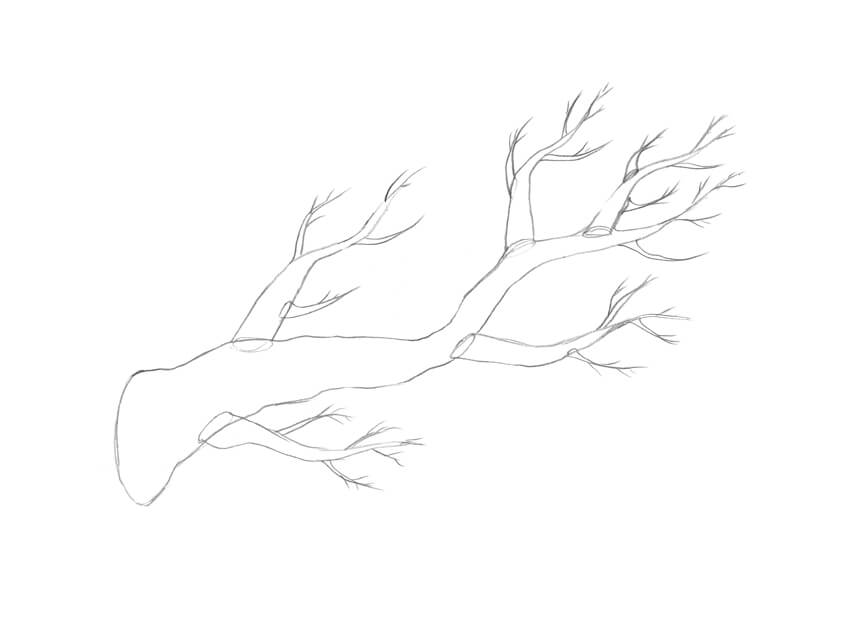
Step 6
I draw the leaves; they capture light energy and convert it into sugars by photosynthesis, providing the food for the tree's growth and development.Make sure that the leaves in your drawing have different sizes and directions. Usually, we don’t see each leaf as an individual element, but for the sake of our study let’s allow a hint of stylization.

Step 7
I add the long lines and the groups of hatching, imitating the bark texture. It’s so great that we already know how to draw bark, isn’t it?
Step 8
With the 3B pencil, I darken the sides of the branch to make it three-dimensional. I also fill the space around the leaves with groups of hatches to create an illusion of depth.
3. How to Draw a Tree
Step 1
Now we are ready to draw the whole tree. I mark the foundation of the tree and add the core line.
Step 2
A tree usually has a wide foundation and a thin top. I construct the shape of the tree, creating the segments of the shape and joining them together with a pencil contour.
Step 3
I add the shapes of the branches; they differ in size and direction.
Step 4
I erase the subsidiary lines and refine the contour. When it comes to the natural objects, small imperfections are charming!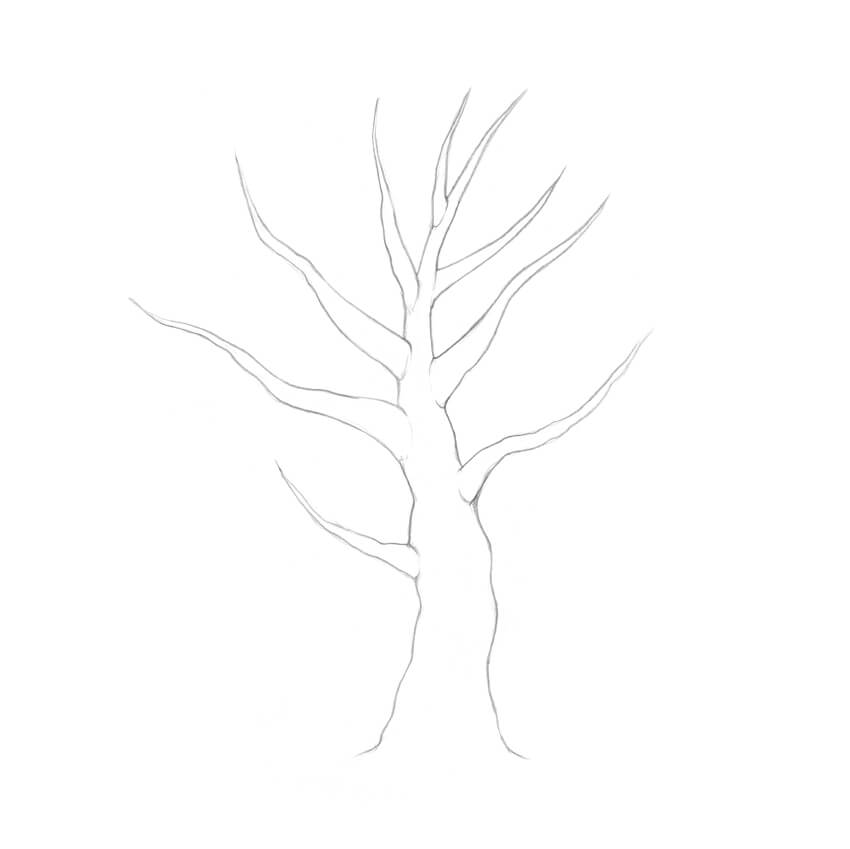
Step 5
I add the smaller branches and twigs, based on the principles that we observed in the previous part of the tutorial.
Step 6
Since we are drawing a whole tree, there is no point in representing every single leaf. I add rough shapes of the leaves just to the lower branches and the bounds of the crown.It’s important to keep the shapes sketchy; too many details will make your drawing look weird and unnatural.

Step 7
Let’s create an illusion of foliage. An easy way to draw masses of leaves is to fill the crown with scribble lines. You can find an example of this technique in the lower corner of the illustration below.With the HB pencil, I cover the area of the crown with scribble-like lines, leaving some areas lighter and darkening the underside of the crown.

Step 8
It’s time to work on the trunk; it usually is darker than the foliage, so having the right contrast is vital.With the HB pencil, I draw the rough pattern of the bark and mark the core shadows. Please note that we see this pattern from a distance, so having much detail here won’t be a help.
I also decided to bring in a cute addition: a hollow with an owl that is looking out.
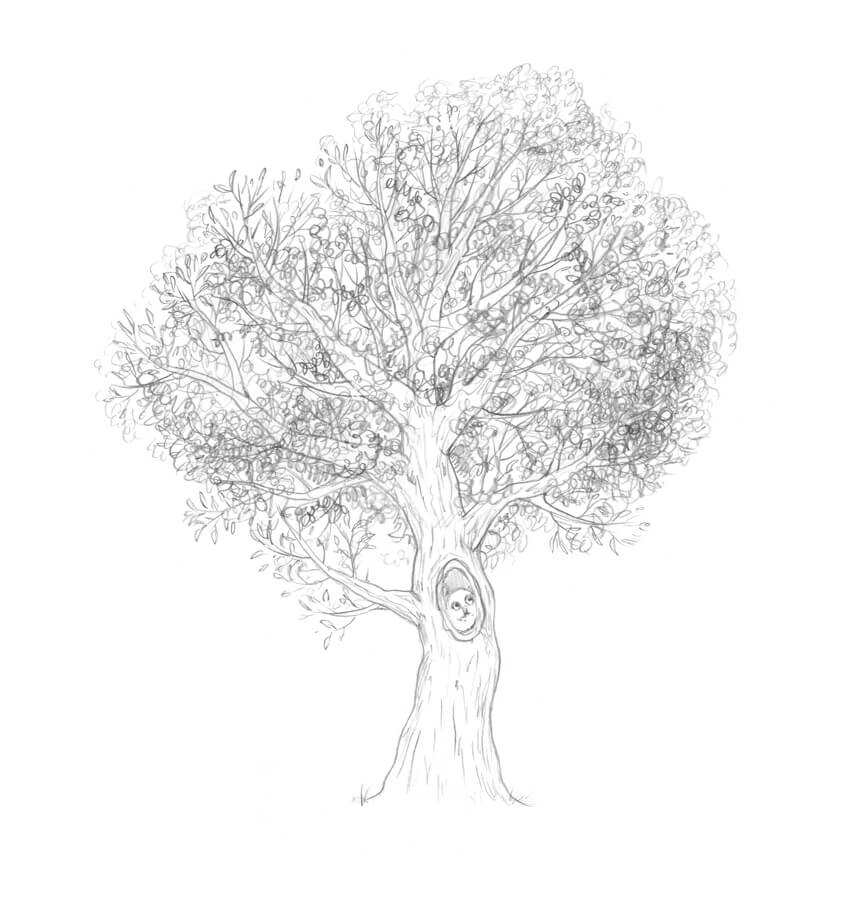
Step 9
With the 3B pencil, I increase the contrast in the drawing. Feel free to make the sides of the tree and the visible parts of the branches really dark.
Step 10
With the 3B pencil, I darken the foliage, accentuating the lower part of the crown. The goal here is to achieve a contrasting yet harmonious look.I complete the drawing by adding some grass near the base of the trunk.

4. How to Draw a Tree Stump
Step 1
With the HB pencil, I draw the core line and the foundation of the stump.
Step 2
I add the top section of the stump. The core line may be a useful reference tool, but you don’t have to make this shape perfectly even.
Step 3
I mark the texture of the bark, using the HB pencil.
Step 4
A transverse section through a tree trunk may show concentric circles of lighter and darker wood—the tree rings (also known as the annual growth rings). These circles usually have a regular shape, but sometimes, due to abnormal growth conditions, they turn into wavy joint lines.I mark the center of the inner part of the trunk, and then draw circular shapes going from the section’s center to the periphery. I also add small cracks to make the drawing more credible.

Step 5
With the HB pencil, I create the texture of the bark. I also add horizontal hatches to the top section of the stump to accentuate its flat plane.
Step 6
I darken the sides of the stump, using the 3B pencil. It’s time to add details to the bark, like small islets of moss, and to vary the pattern of the growth rings.The top plane of the stump may demonstrate interesting transitions from a darker core to a lighter periphery (which proceeds to a slightly darker area near the bark).
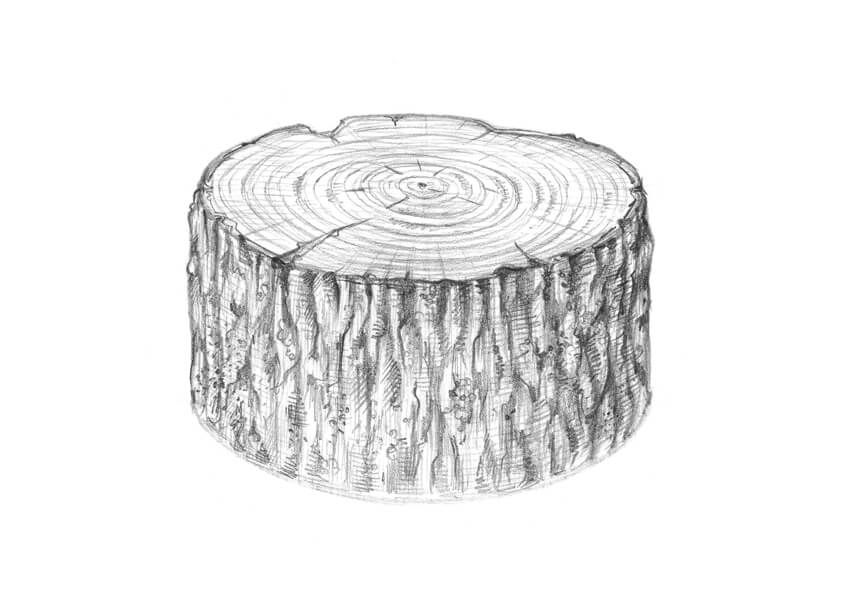
Step 7
The drawing of the stump itself is complete, but it doesn’t look believable. I add some grass and fern leaves to create a nice natural environment.
Your Drawings Are Complete
Congratulations—we’ve created four beautiful graphite pencil sketches! I hope you were inspired by the trees and enjoyed the process of drawing.Let your creative journey be fruitful and full of joy!


0 Comments