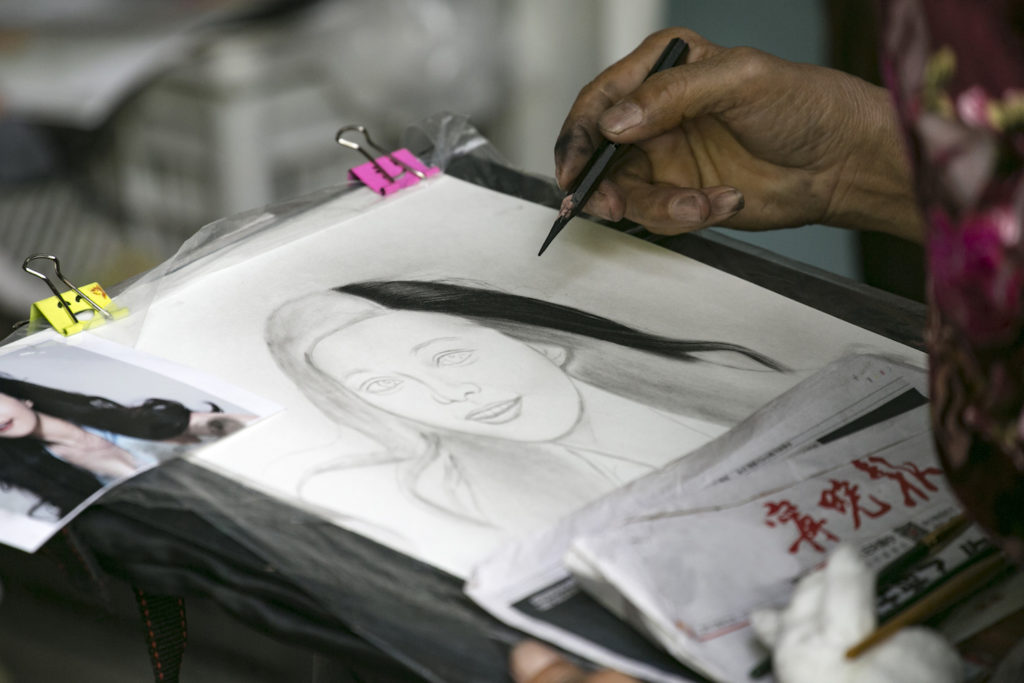
When it comes to creating realistic portraits and figures, knowing techniques for drawing hair — including different lengths, styles and texture — is essential. If you’re a beginner, this may seem like a daunting challenge — especially since this task can take longer than any other part of a drawing. Photo courtesy of Getty ImagesHowever, it doesn’t have to be difficult. Below, artist Lee Hammond, breaks down fundamental tips for drawing hair in both graphite and colored pencil! Pulled straight from her new book, Lee Hammond’s All New Big Book of Drawing, these realistic drawing techniques will have you drawing hair like a pro in no time. Enjoy!
Drawing Hair | Graphite
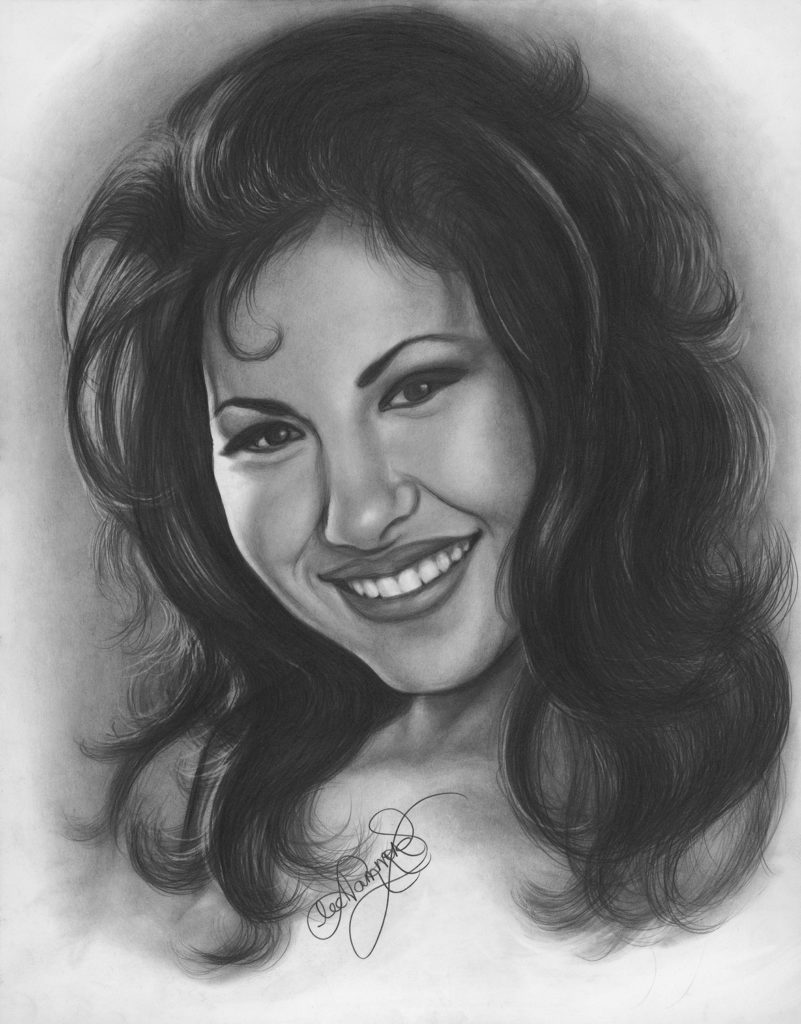
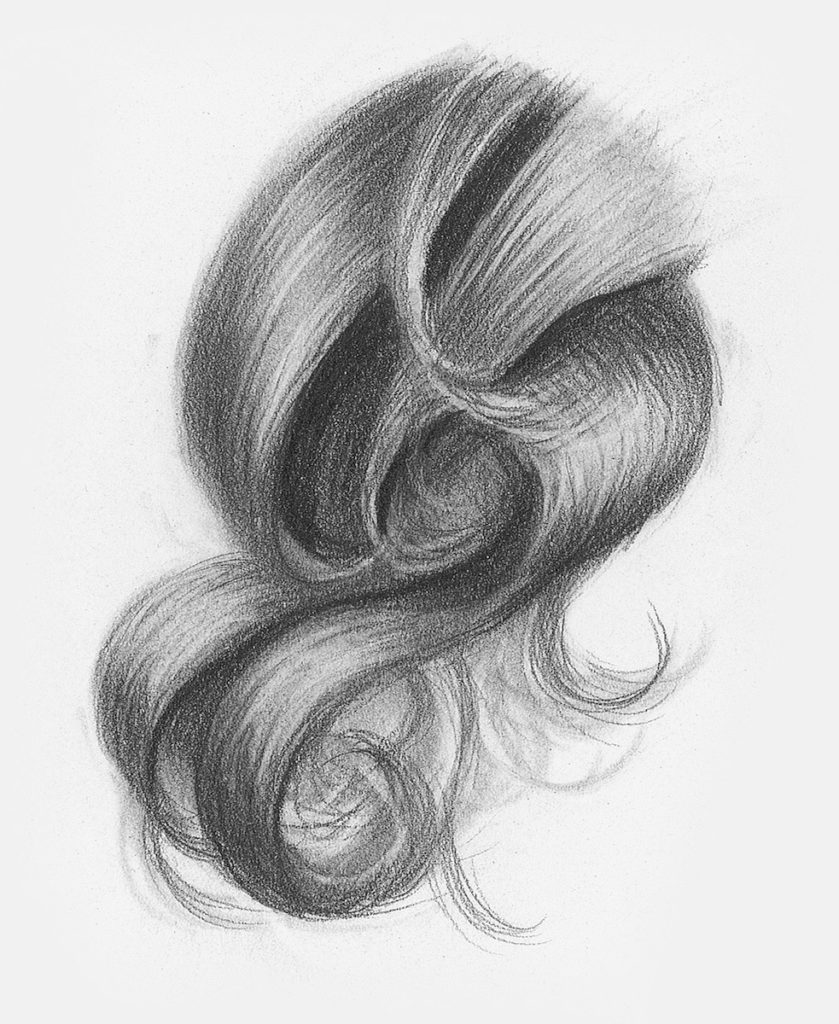
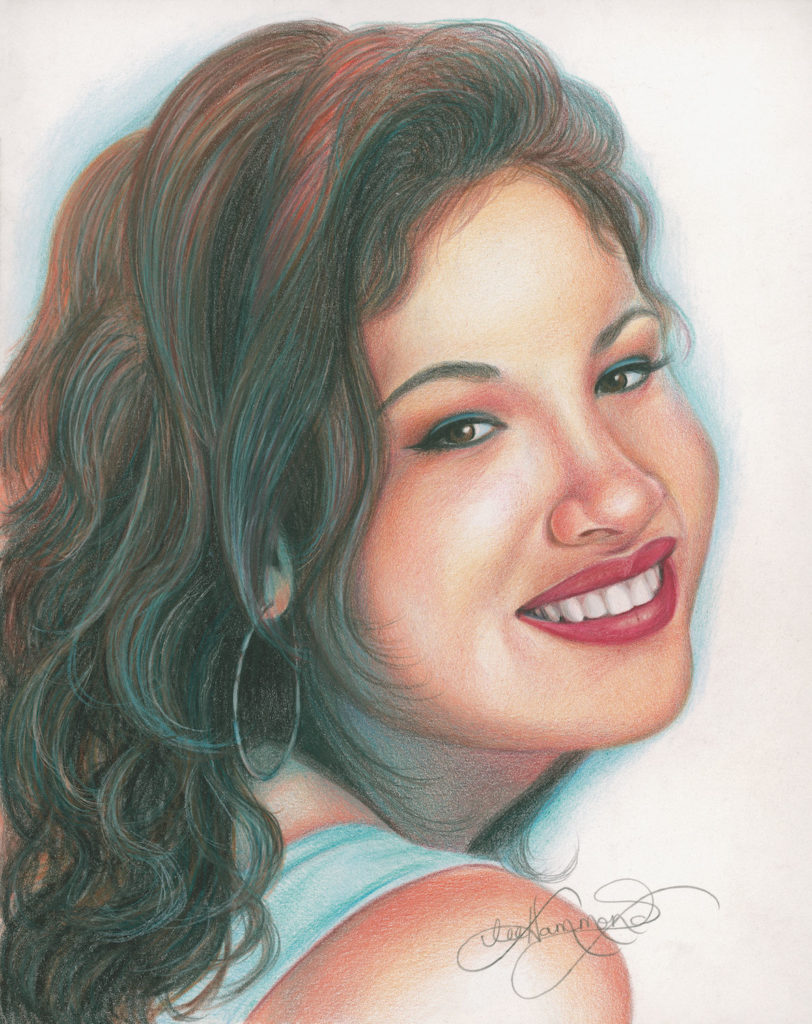
Below are a few segment drawings that show different types of hairstyles and textures. Doing small studies such as these can give you good practice with various techniques. Selina Quintanilla Perez by Lee Hammond, graphite on smooth bristol.And before we get started, here are some essential tips for drawing hair:
The pencil strokes always replicate the hair’s direction and the length.
The color of the hair is determined by how dark or how light your pencil lines are.
A band of light is created in the hair anytime there is a curved area. You will see it in curls and around the circumference of the head.
Highlights are always seen on rounded or protruding areas.
Blend the paper to a gray tone before you lift highlights. This makes them look like they are on the outer surface.
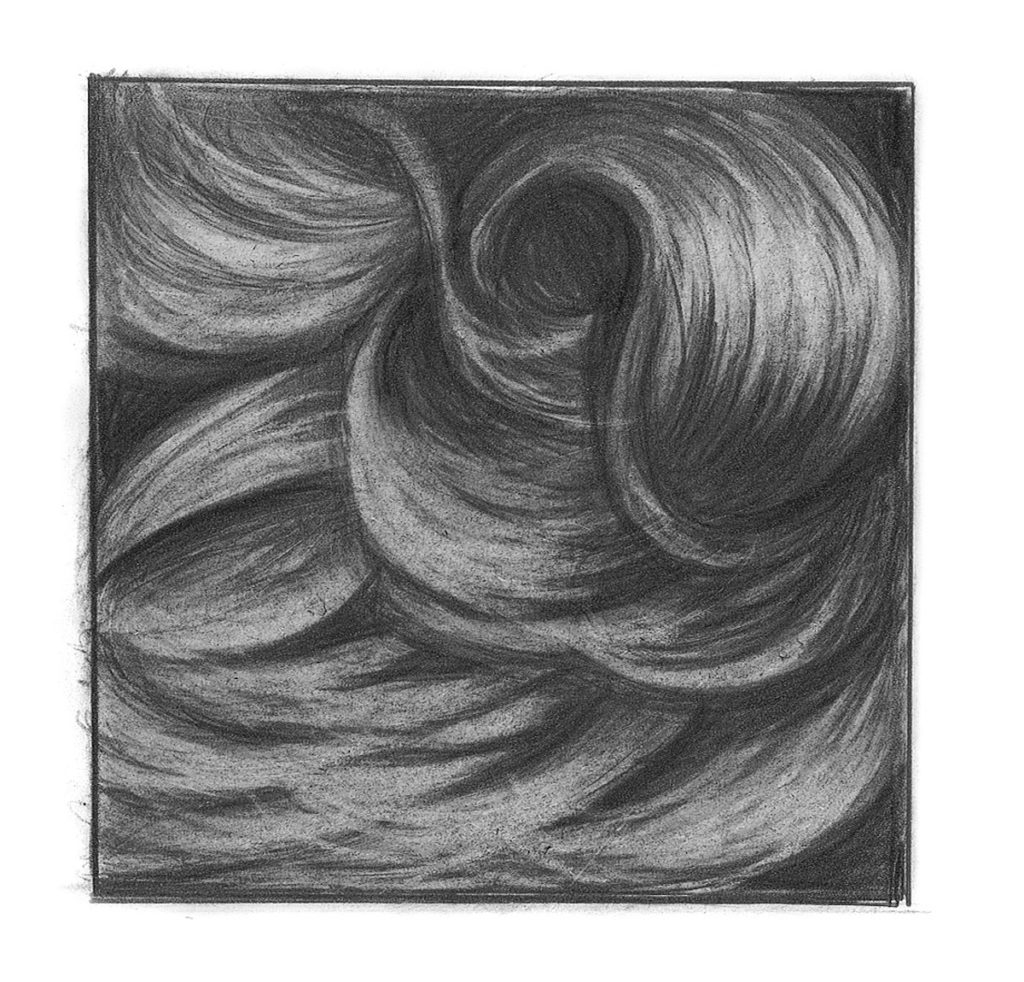
Curly Hair
This study shows how curls form tubular shapes similar to a cylinder. Wherever the curls protrude the most, the highlight shows.
The pencil lines create the texture of the hair, following the direction the hair is going. The highlights are lifted with the same type of quick stroke. You can tell this is dark hair by the depth of the tones.
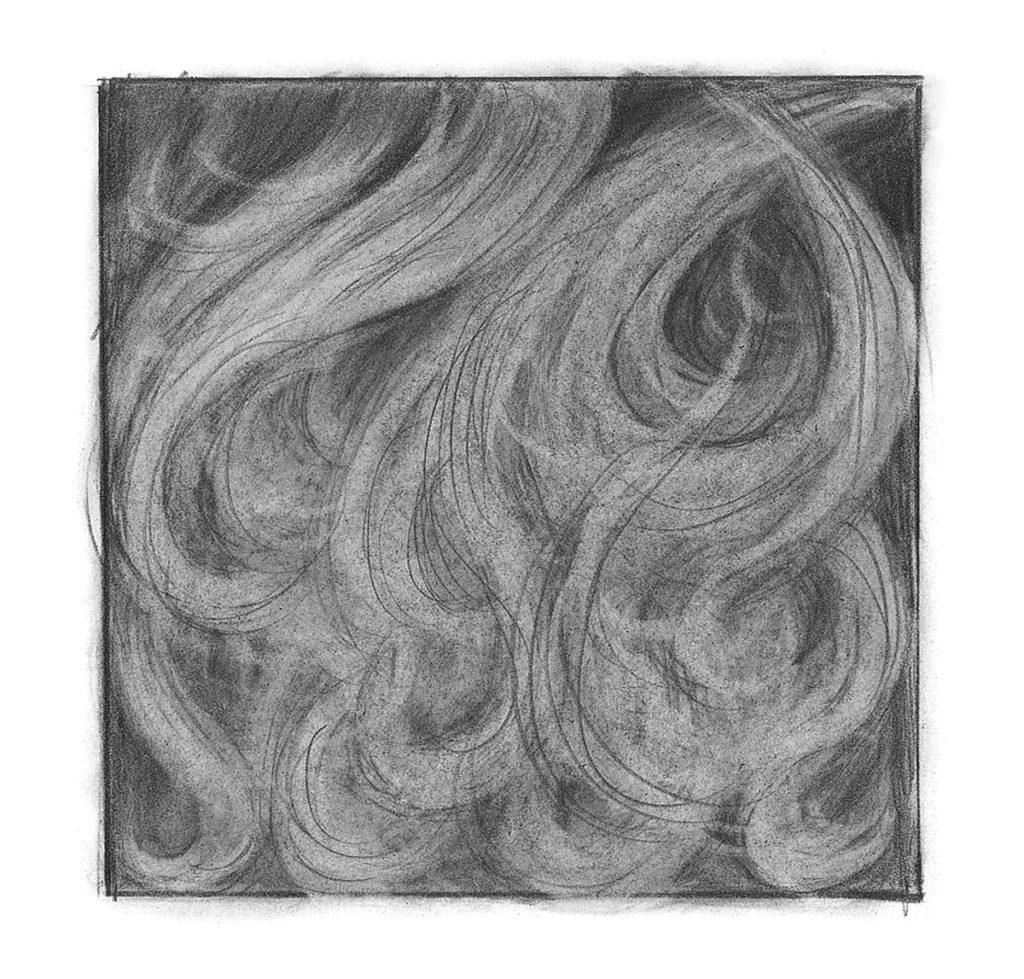
Frizzy or Permed Hair
This study shows what frizzy or permed hair looks like. The curls are less distinct here because of the randomness of the hair direction and the overlapping of hair strands.
The pencil strokes are more blended out because of the frizzier texture of the hair. This hair appears much lighter than the previous example.
Layered Hair
In layered hair, V shapes are created — which also occurs when drawing animal fur, feathers and flower petals. These V shapes are where things overlap and recede, and the deep V of darkness gives the illusion of depth.
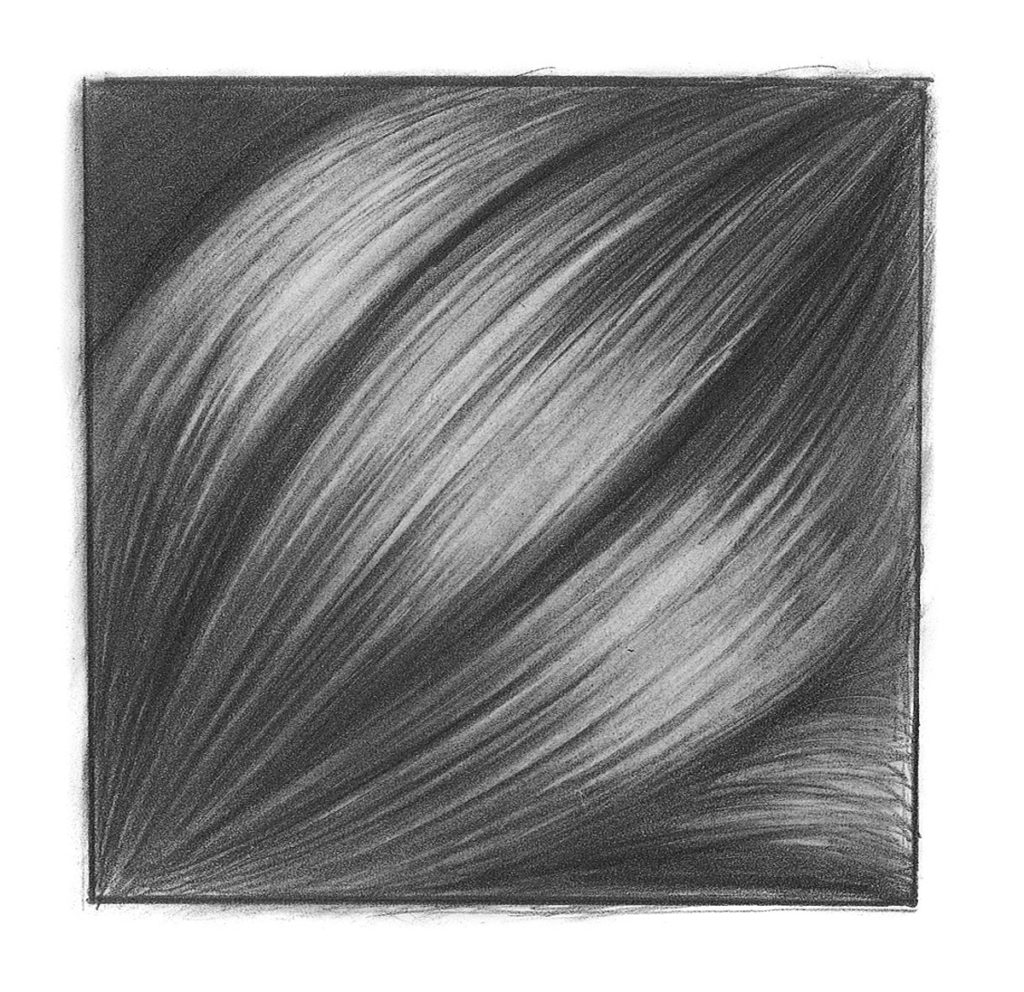
Band of Light
This is an example of the bands of light — areas where the hair is curved, such as in bangs and around the head. It is the most obvious with long, smooth hair.
Drawing Demo | Straight and Curly Hair
There are many different types of hairstyles and textures. These quick exercises below will give you some practice with some of the most common styles.
Each type requires a different approach. The texture and color are dependent on the type of pencil stroke used and the pressure applied.
Materials you’ll need:
Drawing paper
Kneaded eraser
Mechanical graphite pencil
Stump or tortillion
Straight Hair
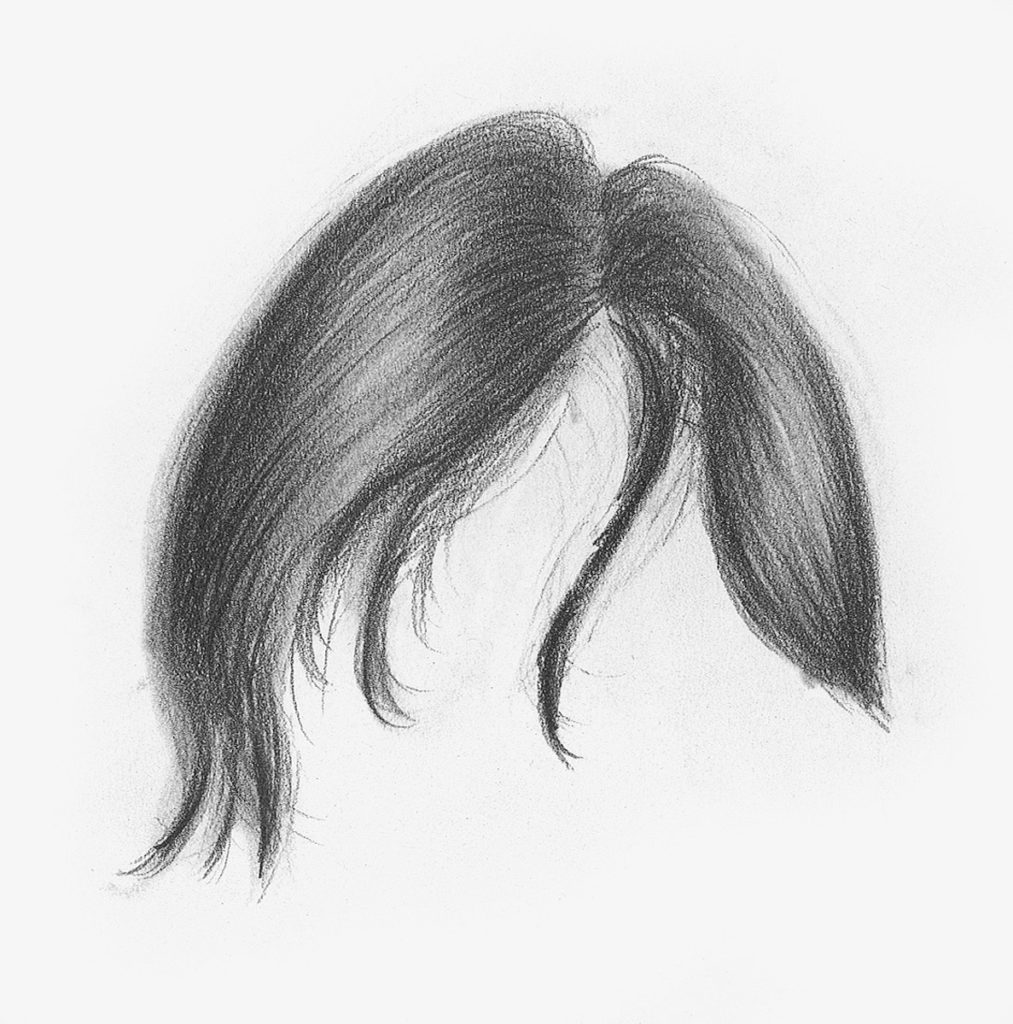
1. Lay in the Shape
Start your drawing by laying in the overall shape of the hairstyle with a pencil.
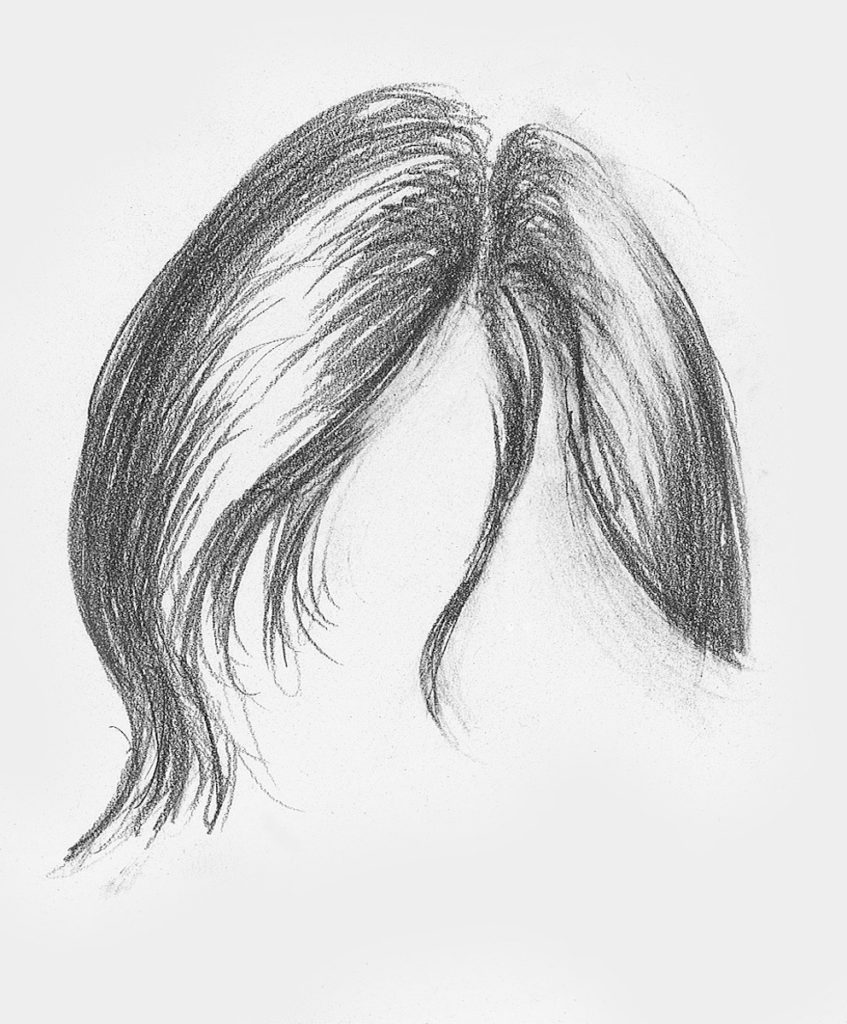
2. Apply the Darks
Next, apply dark pencil strokes to create the illusion of length. Notice the bands of light. This is where the hair shows curves. 3. Blend, Reapply Darks and Lift
Then, blend the drawing with a stump or tortillion. Reapply the dark areas using firm quick strokes. Lift the bands of light with a kneaded eraser.
Curly hair
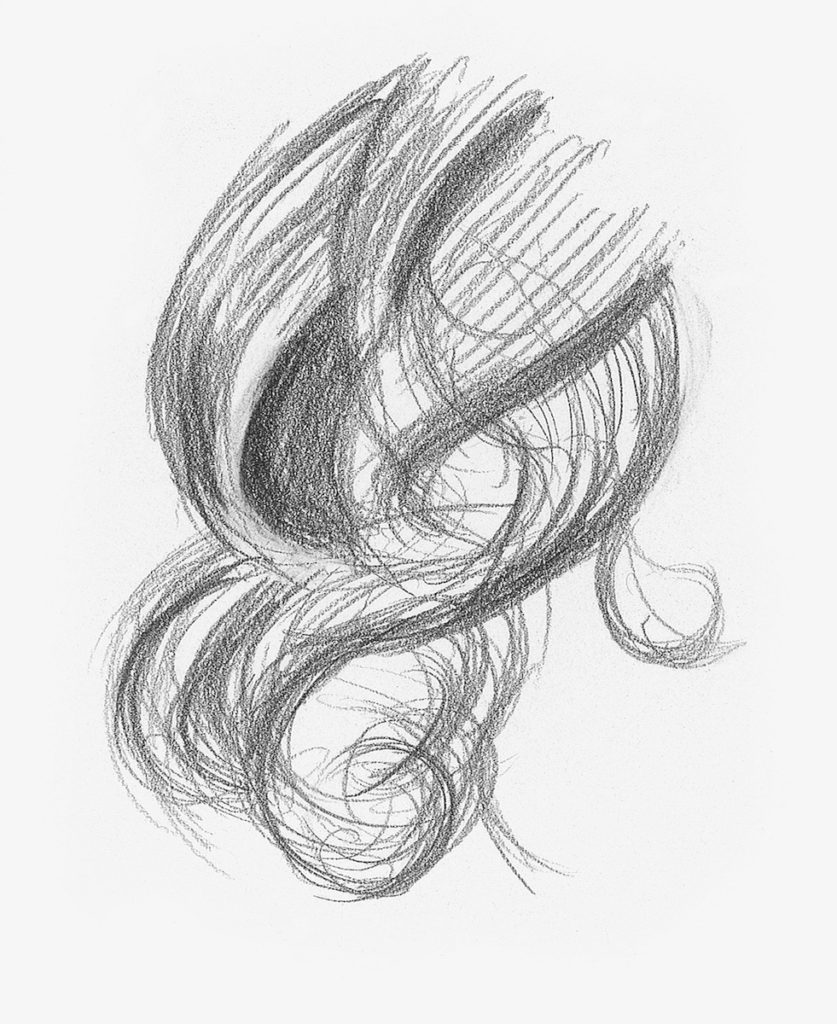
1. Lay in the Shape
First, draw the overall shape of the hairstyle. Then, use long, curved pencil strokes to create the shapes of the curls. 2. Build up the Hair Strands
Use more curved lines to build the hair strands and dark areas of overlap. 3. Blend and Lift
Blend the drawing to a gray tone. Use a kneaded eraser to lift the bands of light out of each curl.
Drawing Demo | Hair in Colored Pencil
Adding color to the mix can bring your drawings of people to life, but it can also make the drawing process even more complex. It’s important to note that drawing, especially portraits, is not something you can learn in a day. Drawing people accurately takes a solid understanding of anatomy and a lot of practice. So be prepared to do a lot of work before diving in and trying to draw the favorite people in your life.
And, as noted previously, drawing hair correctly is a big part of being able to draw more realistic people. Now that we have a quick lesson on drawing hair in graphite under our belt, let’s learn a few tips for drawing hair with colored pencil. Portrait by Lee Hammond, colored pencilThe full-color portrait, above, shows how reflective color can be. If you look closely, you can see the subtle blue tones reflecting onto the skin and hair of the subject. I love drawing hair and all of the waves and colors being reflected throughout it.
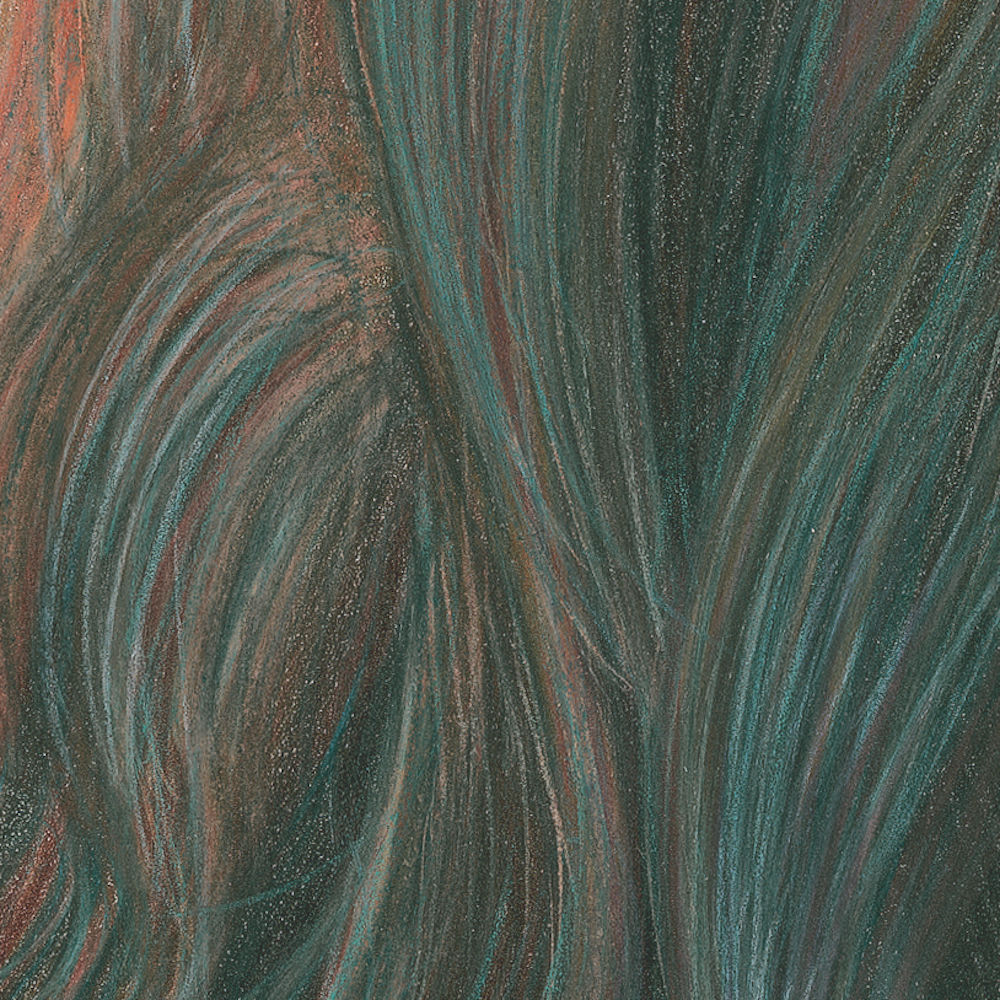
Before we get started with a few mini demonstrations, let’s take a look at the close-up images of the portrait, which show different hair types and how they are drawn. By viewing them up close, you can see how critical the pencil strokes are to creating texture.
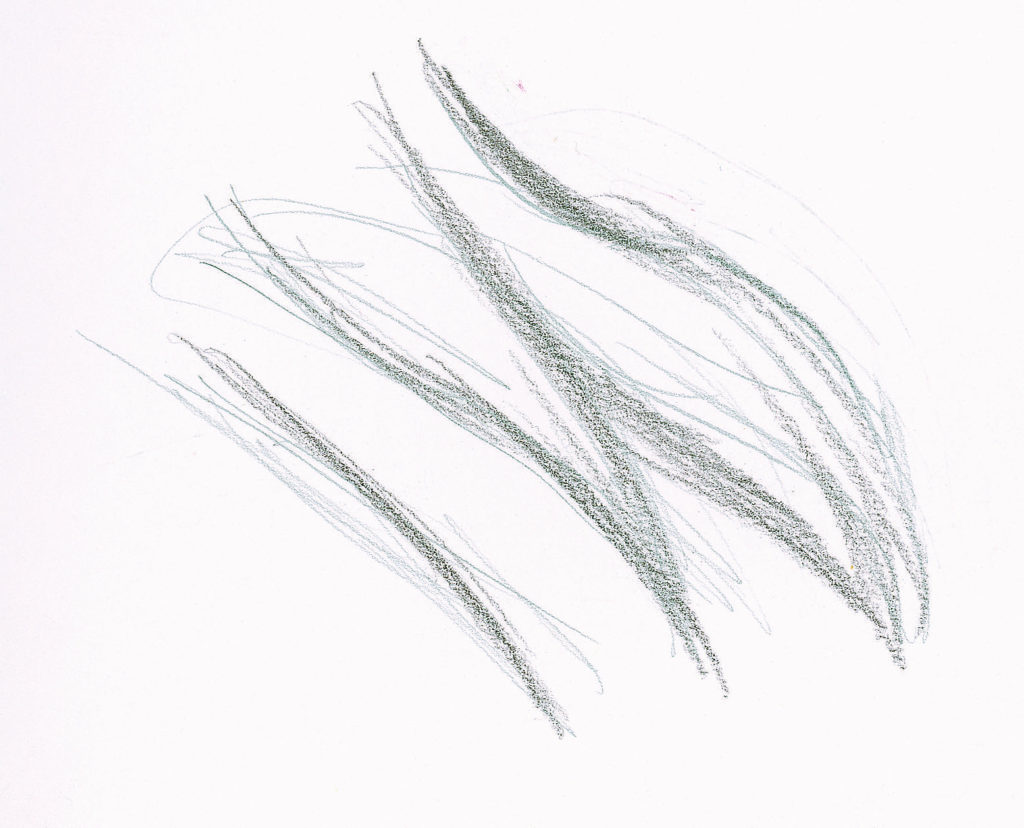
Burnishing for Long Waves
The curves and waves of the hair were done with long, curved pencil strokes. It required many layers. The blue and orange tones were added on top with a burnished approach.
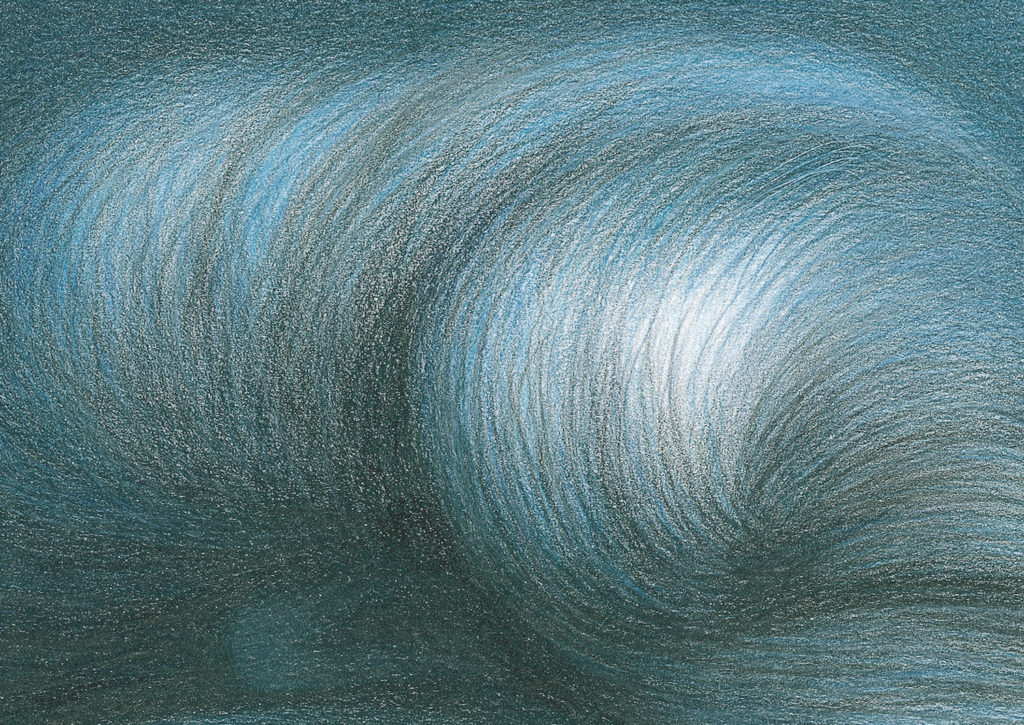
Band of Light
This shows the band of light, where the hair creates a tubular shape. This occurs when long hair follows a curve, and the protruding areas gather light. You will see this band in curls where the hair bends as well.
Drawing Demo | Long and Short Hair
There are endless styles, textures and colors when it comes to drawing hair, so it would be impossible to cover them all. But it is important to know how to draw as many different types as possible if you want to excel at portraiture.
These quick exercises will give you some practice with two common types of hair: long and wavy hair, and short and curly hair.
Materials you’ll need:
Paper (regular surface bristol)
Colored pencils: Dark Umber, Light Umber, Peach, Terra Cotta
Kneaded eraser
Mechanical graphite pencil
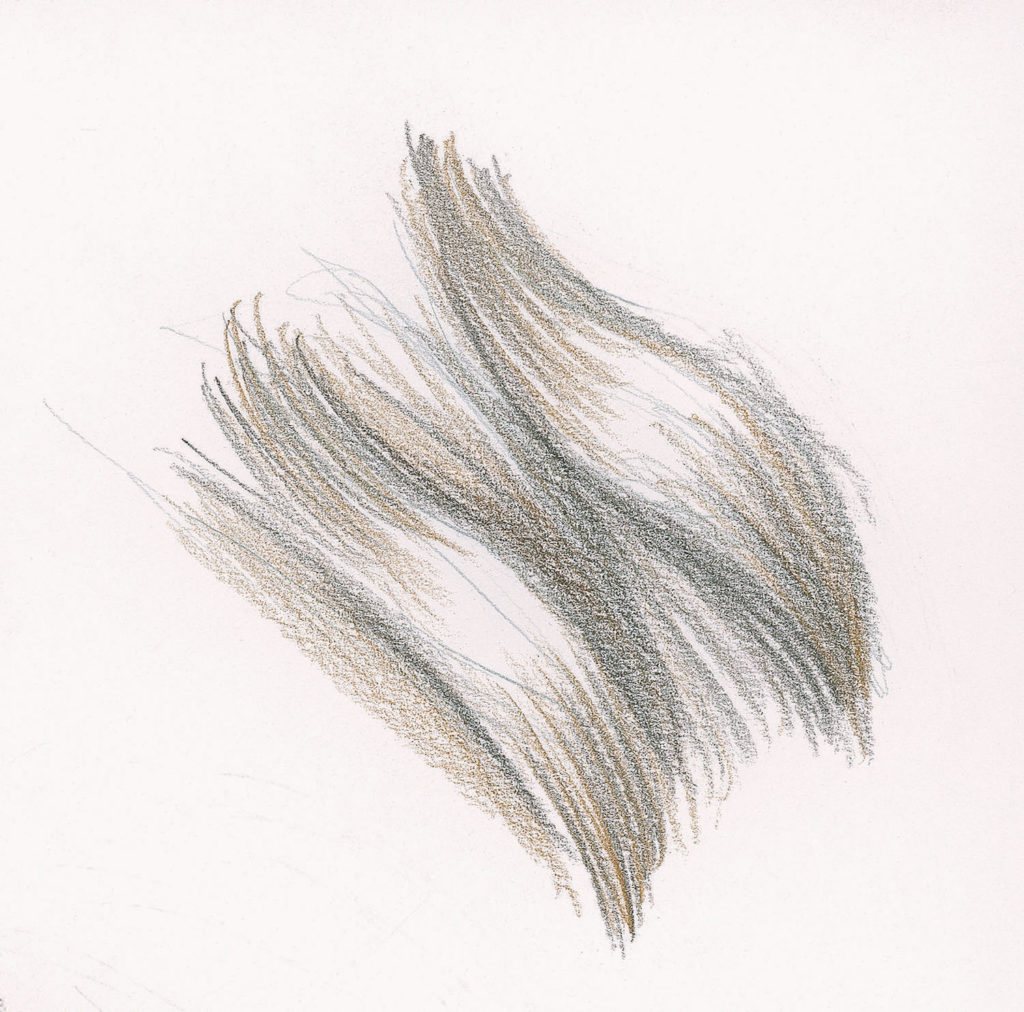
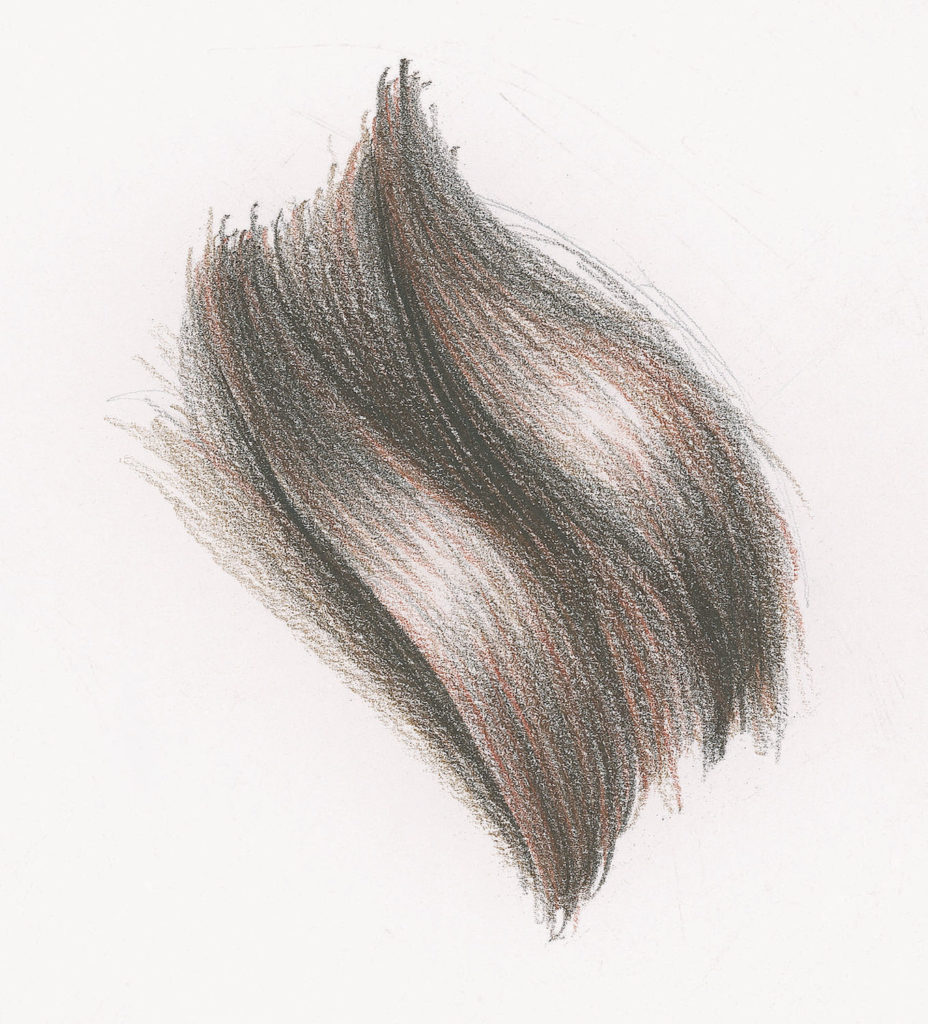
Long, Wavy Hair
1. Draw the Shapes
To begin, lightly draw the shapes of the hair with a mechanical pencil. Then, go over it with some Dark Umber to separate the layers of the hair. 2. Create the Hair Strands
Next, add Light Umber to the hair, and then deepen the dark areas with Dark Umber. Leave the highlight exposed. Use a very sharp pencil point and long, quick pencil strokes to create the appearance of hair strands. 3. Deepen and Darken
After you draw the hair strands, use Terra Cotta to give it a reddish shine. Then, deepen the recessed areas with Dark Umber. Leave a band of light in the protruding areas so the hair looks curved and wavy.
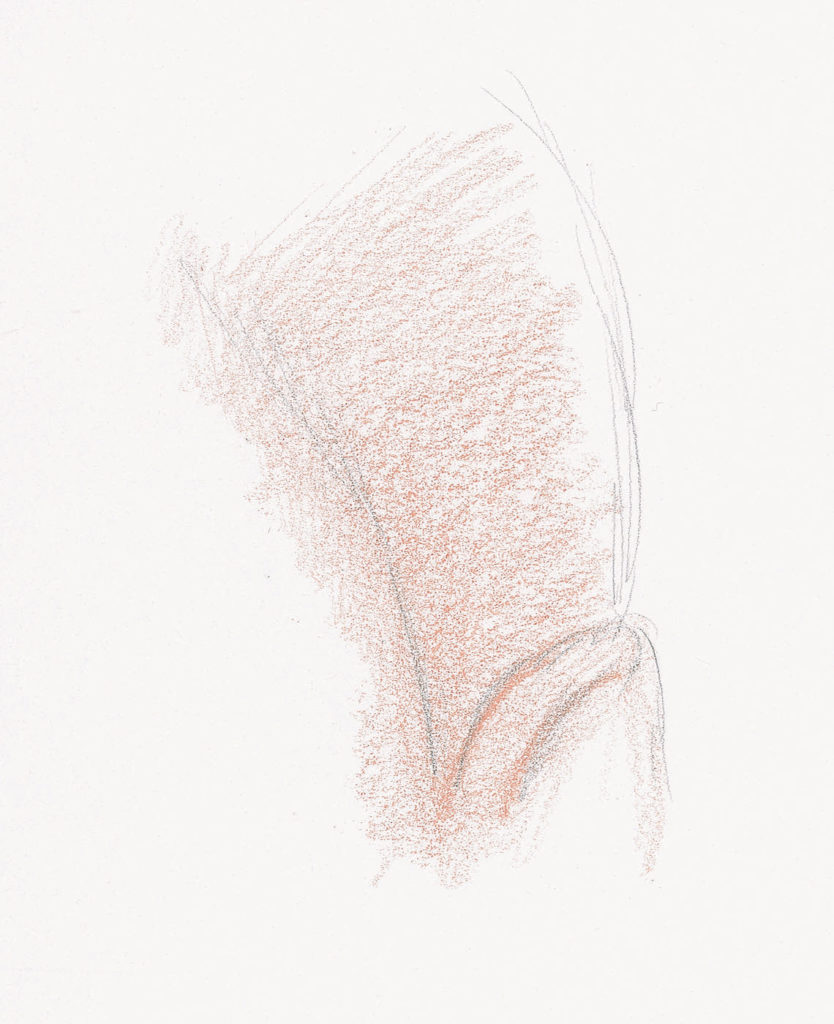
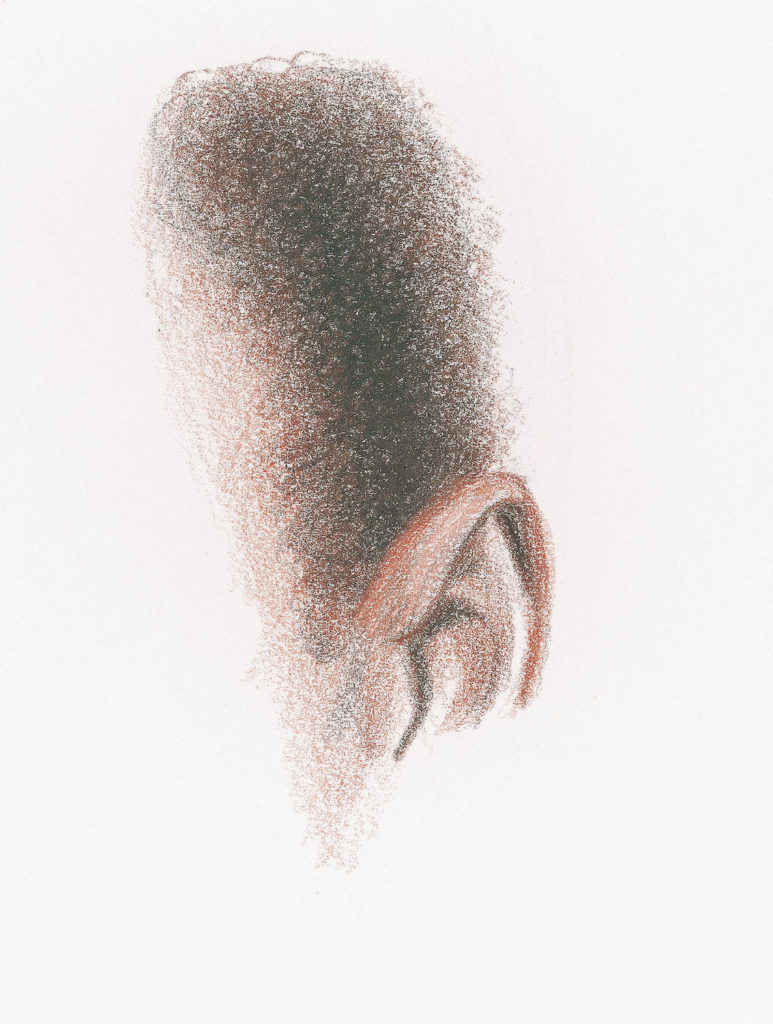
Short, Curly Hair
1. Draw the Shapes and Start the Skin Tone
Lightly draw the shapes of the hairline, ear and overall shape of the hair with mechanical pencil. Then, lay in Peach to start the skin tone. When drawing very short hair, take the skin tone up into the hair area. 2. Build Up the Hair
Apply small, circular strokes to the hair area with Terra Cotta. Use a light touch, taking it out into the skin area to create a hairline. 3. Continue Layering
Layer the hair with Dark Umber over Terra Cotta. Keep it lighter on the outside edge where the light comes through as well as where it grows out of the hairline. Fill in the center area deepest and thickest.
From short to long and curly, drawing hair with these tips will make your drawings more realistic and accurate. Practice drawing different textures, colors and lengths to perfect your hair drawings. Then, combine facial features with your drawings to create realistic portraiture! Drawing hair is the first step to creating stunning and accurate portrait and figure drawings. Understanding how hair is drawn and behaves may even help you draw animals! The possibilities are endless with Lee Hammond’s essential tips for drawing hair.


0 Comments