How to Lock Cells for Editing and Protect Formulas
Bottom Line: Learn how to lock individual cells or ranges in Excel so that users cannot change the formulas or contents of protected cells. Plus a few bonus tips to save time with the setup. Skill Level: Beginner
If you share your spreadsheets with other users, you've probably found that there are specific cells you don't want them to modify. This is especially true for cells that contain formulas and special formatting. The great news is that you can lock or unlock any cell, or a whole range of cells, to keep your work protected. It's easy to do, and it involves two basic steps:
Locking/unlocking the cells.
Protecting the worksheet.
Here's how to prevent users from changing some cells.
Step 1: Lock and Unlock Specific Cells or Ranges
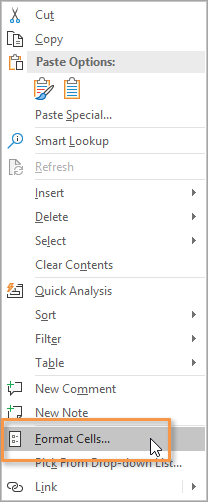
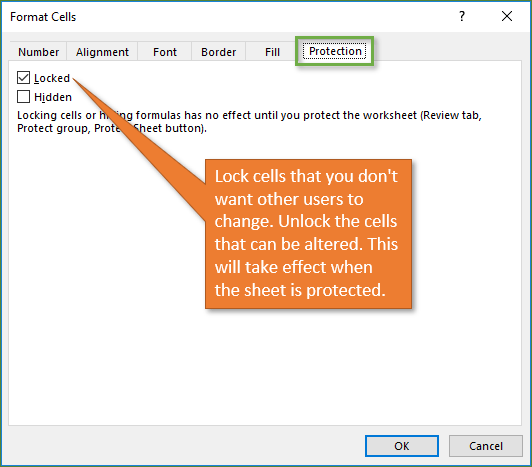
Right-click on the cell or range you want to change, and choose Format Cells from the menu that appears. This will bring up the Format Cells window (keyboard shortcut for this window is Ctrl + 1.). Choose the tab that says Protection.
Next, make sure that the Locked option is checked. Locked is the default setting for all cells in a new worksheet/workbook.
Once we protect the worksheet (in the next step) those locked cells will not be able to be altered by users.
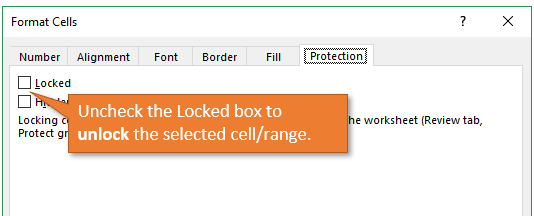
If you want users to be able to edit a particular cell or range, uncheck the Locked box so they are unlocked. Since cells are locked by default, most of the job will be going through the sheet and unlocking cells that can be edited by users. I share some shortcuts to make this process faster in the Bonus section below.
Step 2: Protect the Worksheet
Now that you've locked/unlocked the cells that you want users to be able to edit, you want to protect the sheet. Once you protect the sheet, users cannot change the locked cells. However, they can still modify the unlocked cells.
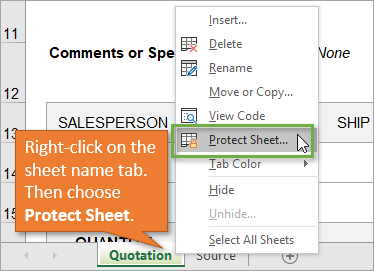
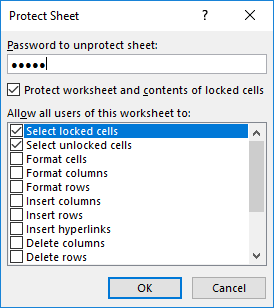
To protect the sheet, simply right-click on the tab at the bottom of the sheet, and choose Protect Sheet… from the menu. This will bring up the Protect Sheet window. If you want your sheet to be password protected, you have the option of entering a password here. Adding a password is optional. Click OK. If you've chosen to enter a password, then you will be prompted to verify your entry after you've clicked OK.
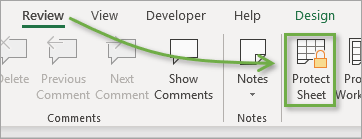
With the sheet protected, users will be unable to change the cells that are locked. If they try to make changes, they will get an error/warning message that looks like this. You can unprotect the sheet in the same way that you protected it, by right-clicking on the sheet tab. An alternative way to protect and unprotect sheets is by using the Protect Sheet button in the Review tab of the Ribbon. The button text displays the opposite of the current state. It says Protect Sheet when the sheet is unprotected, and Unprotect Sheet when it is protected.
It's important to note that all cells can be edited when the sheet is unprotected. After making changes you must protect the sheet again and Save the workbook before sending or sharing with other users.
3 Bonus Tips for Locking Cells and Protecting Sheets
As you can see, it is fairly simple to protect your formulas and formatting from being changed! But I'd like to leave you with three tips to help make it faster & easier for both you and your users.
1. Prevent Locked Cells From Being Selected
This tip will help make it faster and easier for your users to input data in the sheet.
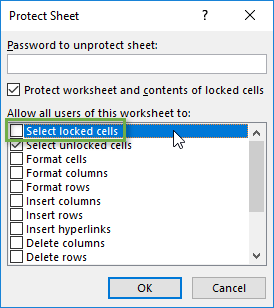
Turning off the Select locked cells option prevents the locked cells from being selected with either the mouse or keyboard (arrow or tab keys). This means users will only be able to select the unlocked cells that they need to edit. They can quickly hit the Tab, Enter, or arrow keys to move to the next editable cell.
To make this change, you just uncheck the option that says “Select locked cells” on the Protect Sheet window. After pressing OK, you will only be able to select the unlocked cells.
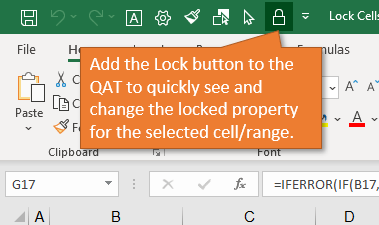
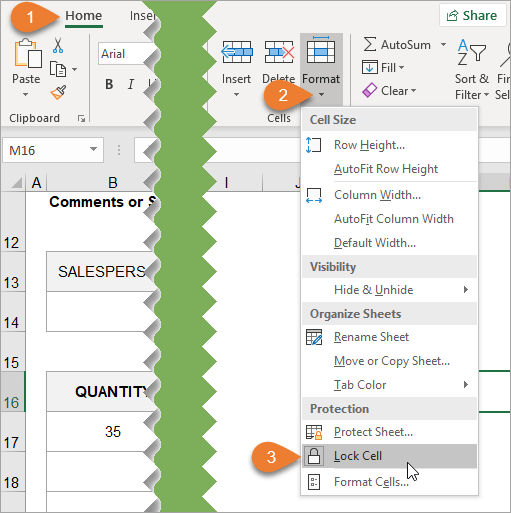
2. Add a button for locking cells to the Quick Access Toolbar
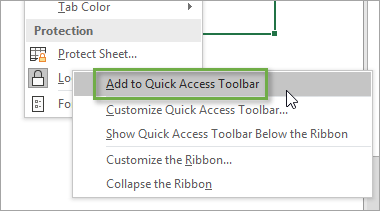
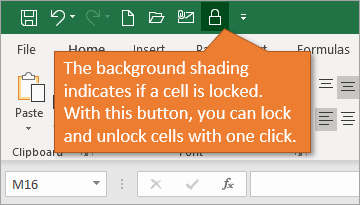
This allows you to quickly see the locked setting for a cell or range. From the Home tab on the Ribbon, you can open the drop-down menu under the Format button and see the option to Lock Cell. If you right-click on the Lock Cell option, another menu appears giving you the option to add the button to the Quick Access Toolbar. When you select this option, the button will be added to the Quick Access Toolbar at the top of the workbook. This button will remain each time you use Excel. You can easily lock and unlock specific cells on your sheet by clicking on this button. You can also see if the active cell locked or unlocked. The button will have a dark background if the selection is locked.
It's important to note that this only shows the locked state of the active cell. If you have multiple cells selected, the active cell is the cell you selected first and appears with no fill shading.
Mixed Lock State
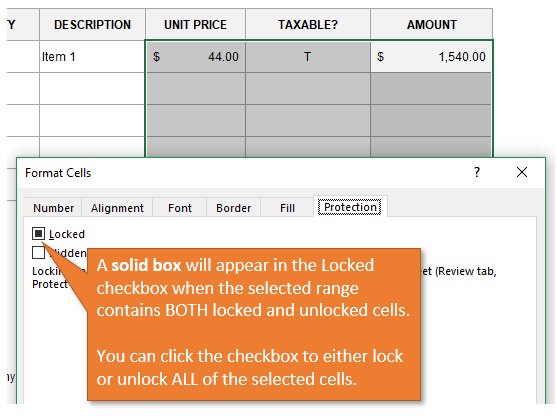
If you select a range that contains both locked and unlocked cells, you will see a solid box for the Locked checkbox in the Format Cells window. This denotes the mixed state. You can click the checkbox to lock or unlock ALL cells in the selected range.
3. Use different formatting for locked cells
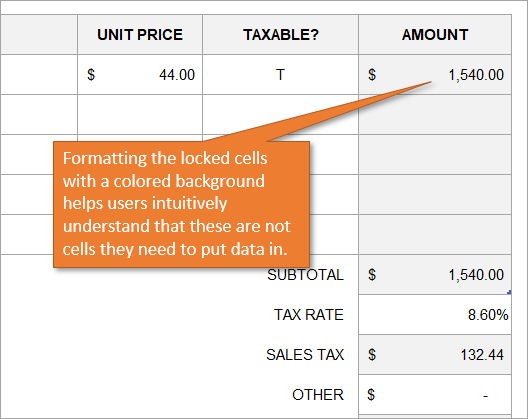
By changing the formatting of cells that are locked, you give your users a visual clue that those cells are off limits. In this example the locked cells have a gray fill color. The unlocked (editable) cells are white. You can also provide a guide on the sheet or instructions tab. You might be wondering where I found this template for a quote. I got it from the template library. You can access the library by going to the File tab, choosing New, and using the search word “quote.”
You can find all sorts of useful templates there, including invoices, calendars, to-do lists, budgets, and more.
Conclusion
By locking your cells and protecting your sheet, you can keep your formulas safe from tampering by other users, and prevent mistakes.
I hope this simple tutorial proves helpful to you. Please leave a comment below if you have any tips or questions about locking cells, protecting sheets with passwords, or preventing users from changing cells.
Thank you! 🙂


 Lock Cells And Sheet Protection - Quote Example.xlsx (23.1 KB)
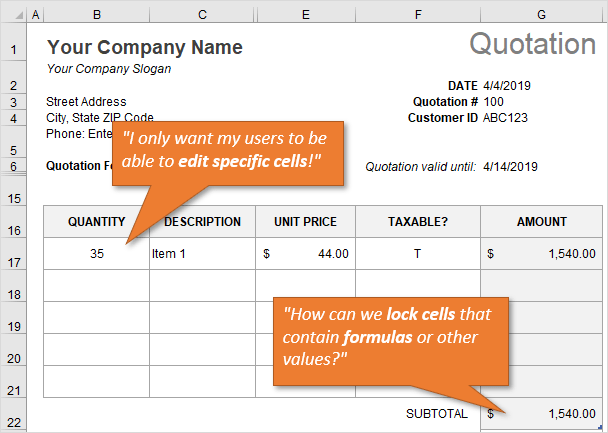


0 Comments