 |
| How To Quickly Disable The Windows 10 Lock Screen |
Are you tired of every time your computer boots or wakes from sleep, you have to click your mouse button or swipe up on your mouse pad or screen (i.e touchscreens) to make the windows 10 lock screen disappear before you get hit with a login window. worry no more because your solution is right here in this post on How To Quickly Disable The Windows 10 Lock Screen.
Thus you can now save extra time and an extra click by disabling the windows 10 lock screen and going straight to the login screen in Windows 10.
Below a basic steps with description on How To Quickly Disable The Windows 10 Lock Screen
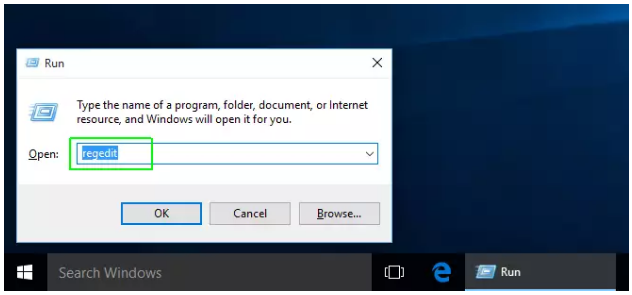
1. First of all you have to open the registry editor. Simply hit CTRL + R from your keyboard, then type " regedit " into the prompt or window and hit the Enter key from your keyboard. Then Click Yes if you receive a warning from User Account Control asthe case may be.
 |
| The Run Windows |
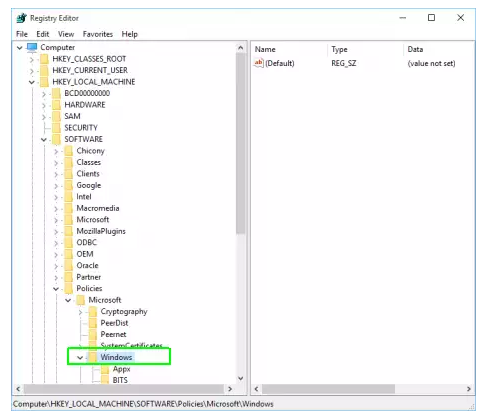
2. Then now navigate to HKEY_LOCAL_MACHINE\SOFTWARE\Policies\Microsoft\Windows by opening the various folders in the tree that will be displayed.
 |
| Navigating to HKEY_LOCAL_MACHINE\SOFTWARE\Policies\Microsoft\Windows |
3. Now then create a new registry key called "Personalization" if one does not already exist. To create the key, just right click in the right pane of the window, select Key from the menu that will be displayed and then rename the key to "Personalization."
 |
| Creating a new registry key called "Personalization" |
4. then navigate the Personalization key you just created.
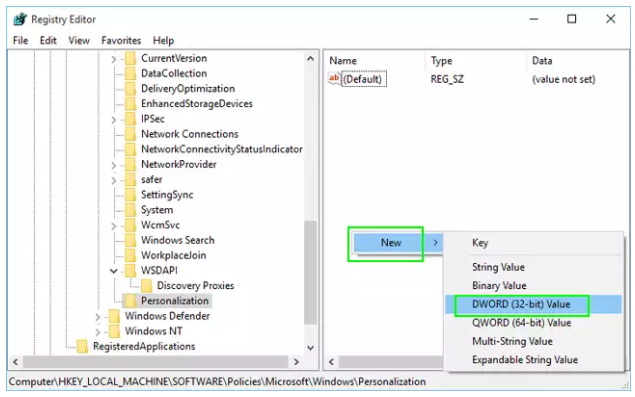
5. Now right click in the right pane of the window and select New then DWORD (32-bit) Value.
6. Then name the new value " NoLockScreen " (Note: please dont include the quotes).
7. Now set NoLockScreen to 1 by simply double clicking on its name, then entering a "1" in the Value data field and hitting OK.
5. Now right click in the right pane of the window and select New then DWORD (32-bit) Value.
 |
| Selecting New then DWORD (32-bit) Value. |
 |
| Naming the new value " NoLockScreen " |
7. Now set NoLockScreen to 1 by simply double clicking on its name, then entering a "1" in the Value data field and hitting OK.
 |
| Setting NoLockScreen to 1 |
So finally, after your next reboot, the lock screen will be gone automatically. So if you now want to re-enable the Lock Screen, just go back using thesame process but this time you will change the registry setting from 1 to 0. So as easy as that hope you enjoyed this post on How To Quickly Disable The Windows 10 Lock Screen.


0 Comments